By 2020, over 50% of all Internet searches may be based on images and voice. What does this mean for you as a website owner? That images will soon become your key source of traffic – as long as you know how to use them.
Image SEO is an important and exciting branch of the great SEO tree. Google does take your images seriously when ranking your site, so the time you spend optimizing your pictures is a great investment. However, too many bloggers and website owners still don’t realize that they can use the power of images to drive traffic.
If you name your images “dog1” or similar, if you leave the alt text field blank, if you don’t add captions – then read our beginner’s guide ASAP. It’s only a few key steps, but they will take you far.
Golden rule no.1 – Choose your image wisely
The first sacred rule of image SEO is this: use relevant images. If your article is about tea, then select pictures that feature tea plantations, dry tea leaves, tea in a cup, people drinking tea… Not cats, or the Great Wall of China, or your favorite movie star. This should be clear.
1) Original or stock? TRY to use original images if you can. If you run an online store, then you’ll definitely need unique photos of all your items. If you are writing about tea, then you might have pictures of a plantation you took on a trip to Asia – or of a cup of golden tea you had in a local teahouse somewhere. They might not be as fancy or high-res as stock photos, but they’ll be unique – Google likes that.
Does this mean that Google dislikes non-original images? Well, yes and no. Some people believe that stock images are penalized, but there is no evidence to support this. Rather, your rankings can suffer if you use an image that is found on many pages across the web.
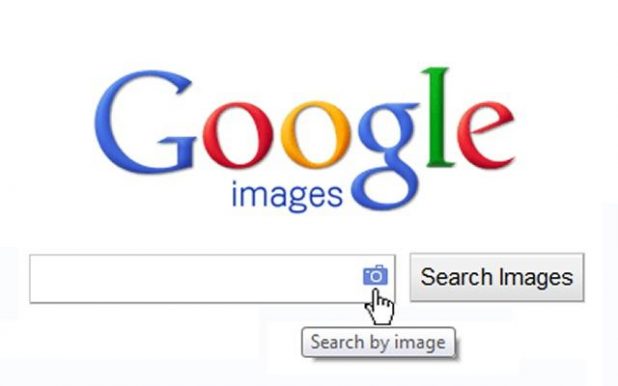
2) Avoid overused images. To see if a picture is already used on other sites, try the reverse search feature on Google: in image search, click on the camera icon and then either upload a picture or insert the URL of an image you found online.

In Chrome, it’s even easier: right-click on any image online and choose “Search Google for image”. You’ll see all the instances where it appears on the internet. If there are many, choose something else.

By the way, Google Image Search also has a handy option for finding free stock images. While in image search, click on Tools and select “Labeled for reuse with modification”. Otherwise, you can search on Unsplash, Pexels, or Pixabay – all these sites have thousands of gorgeous photos, and they are all 100% free.
Golden rule no. 2 – Work on your image first
So, you’ve got your image. Should you go and post it on your site just as it is, all 1000 kb of it, named something like “dog1”? No.
3) Resizing. First, make it as small as you can. Page speed is now a ranking factor for both mobile and desktop searches on Google, and a heavy image will slow your page down. So don’t try to make it look small with CSS – you have to actually scale it.
You can use Adobe Photoshop, GIMP (a great open-source alternative), or any image editor that has the scale/resize feature. Decide how small you want it on your page (in pixels) and scale it down to that size. You can usually make a high-resolution photo 10+ times lighter and it will still look fine.
4) Naming. Google does pay attention to filenames, so choose a title that describes the picture. Not “tea1”, “tea2” and so on, but something like “tea-plantation-india”, or “oolong-tea-cup”.
By the way, see that I used hyphens and not underscores? It makes a difference! Google understands hyphens as separators between words, but it’s blind to underscores. So “oolong_tea_cup” is just “oolongteacup” for Google – and that’s not something that will drive traffic to your page, is it?
5) Format. Google’s favorite image format is .WEBP. It’s great for compression, it makes your pages faster, and – surprise! – it’s being developed by Google. Imagine that Google AI was offering different kinds of cookies: some that it bought from a store and others that it baked itself. Which ones would you choose to please your all-powerful host? The home-made cookies, obviously.
You can save your pictures in .WEBP in Photoshop GIMP using special plugins.
Golden rule no. 3 – Describe it properly
It’s finally time to add your image to the site!
6) Alt-text. Start with writing a descriptive alt-text. It’s called “alt” because it will be used as an alternative if the actual image fails to load.
Google learns a lot from the alt text, so it should describe your image clearly – say, “girl picking tea on a plantation in China”. Keep it under 120 characters.
You CAN add keywords – but the text should still read naturally. For instance, if you happen to sell Adidas jackets and you just happen to have the right picture of someone wearing it, then you can write “girl in an Adidas jacket on the Great Wall of China” – but not “buy Adidas jacket online store Great Wall girl China great price”.
7) Caption. Research shows that people read captions more often than other parts of your page. What’s more, Google reads them, too, so add them! A caption should refer to the picture and add useful information if possible. “A woman from the Dai ethnic minority picking tea in Yunnan, China” is an example.
8) Placement. Google is particularly attentive to the text that’s close to images. So make sure to place your picture next to the paragraphs containing your keywords.
Congratulations – you’ve completed all the steps! Your file is properly scaled, compressed, and saved in the right format under a fitting name. It has a descriptive alt text, it’s light, and has an informative caption. It’s even located in the winning spot – near the most important section of your text. Google will definitely like it!
If you want to practice your new image SEO skills, then you can take old blog posts and replace images in them, going through all the steps. Research shows that adding new pictures to existing pages can increase traffic by over 100%, so why not try it right now? Remember – it’s not an arcane art, it’s just a skill – and you can master it.


